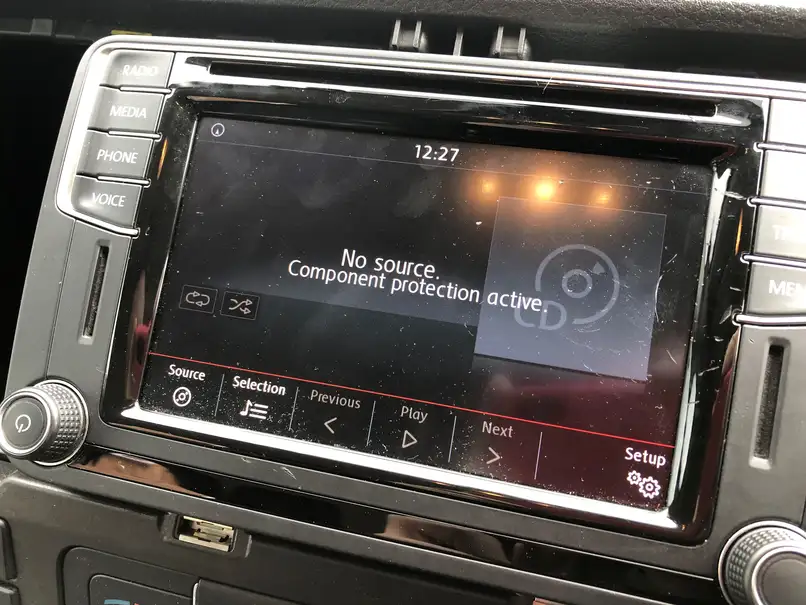
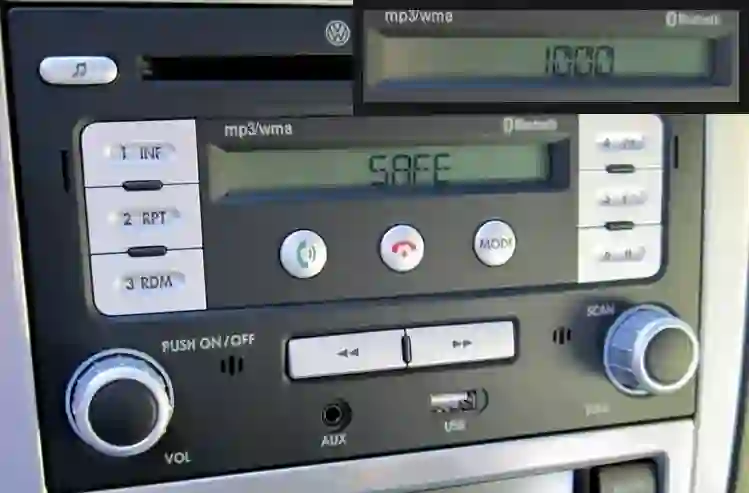
If your Volkswagen radio is locked, showing SAFE, or you need the serial number to recover a radio code, the first job is usually to remove the unit safely and read the label on the top, side, or rear of the radio. On older Volkswagen models, the radio is often removed with release keys. On many newer models, you may need to remove trim first, and on some later infotainment systems the screen and the main unit are separate, with the main unit sometimes located in or behind the glovebox.
This guide explains the process step by step for the most common Volkswagen radios and vehicle generations, including Beta, Gamma, Monsoon, RCD 200, RCD 300, RCD 310, RCD 510, RNS 315, RNS 510, Composition Media, and Discover Media. It also explains where to look first before removing anything, because some Volkswagen owner documentation says the radio code and serial details may already be on the original radio card supplied with the vehicle.
Before You Start
You will usually need:
- A plastic trim removal tool.
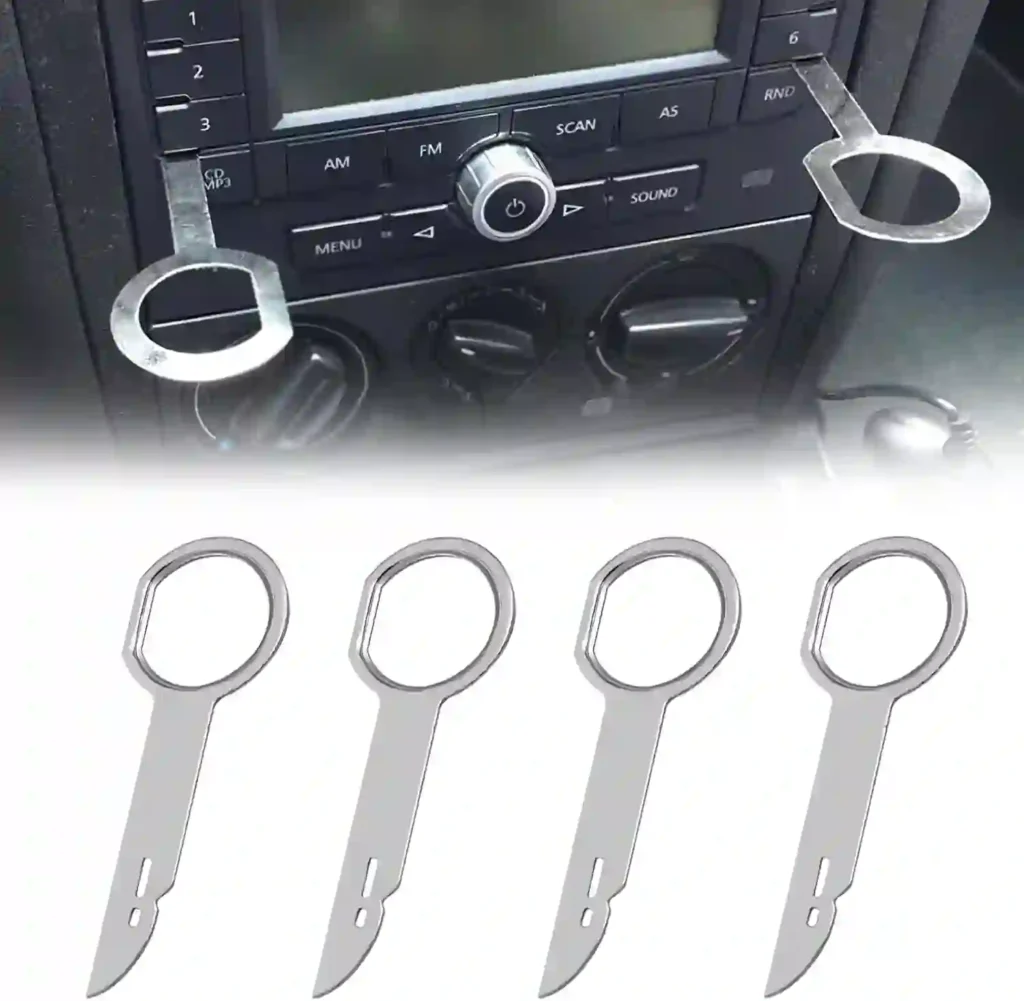
- The correct Volkswagen radio removal keys, if your radio uses key slots.
- A Torx screwdriver, usually T20 or T25, for trim-mounted units.
- A flashlight.
- A soft cloth to protect the dashboard.
- Your phone, so you can photograph the label before reinstalling the radio.
Before removing the radio, switch off the ignition. If you are worried about short circuits or accidental damage, disconnect the negative battery terminal first. Also note that on some Volkswagens, disconnecting power will trigger the radio’s anti-theft protection, which is why you should have the serial number and code information ready before reconnecting power.
First: Check Whether You Even Need to Remove the Radio
Before taking the dashboard apart, check these places:
- The owner’s manual packet or radio card.
- A sticker in the service booklet.
- A previous photo from a repair or replacement.
- A dealer invoice from a prior code retrieval.
Older Volkswagen documentation specifically notes that the code number and serial number may be supplied on the original radio card in the booklet. If that card is missing, then removal is usually the fastest way to get the serial directly from the label on the unit.
How to Identify Your Volkswagen Radio Before Removal
The removal method depends more on the radio face than on the engine or trim level.
Type 1: Older key-release radios
Common on older Golf, Jetta, Bora, Passat, Polo, and New Beetle models. These usually have small release slots on the front and come out using metal radio keys.
Typical models:
- Beta
- Gamma
- Monsoon
- RCD 200
- Some RCD 300 units
Type 2: Trim-mounted radios
Common on Mk5/Mk6-era cars. The surrounding trim is removed first, then Torx screws hold the radio in place.
Typical models:
- RCD 300
- RCD 310
- RCD 510
- RNS 315
- RNS 510
DIY references from VW enthusiast guides show that many RCD/RNS units in Passat, CC, Golf, and Jetta applications require removal of the trim bezel before the radio can be unscrewed and pulled out.
Type 3: Newer infotainment systems with separate screen/main unit
Common on later Volkswagen infotainment systems. The visible screen is not always the full radio module. In some configurations, the main infotainment unit is inside or behind the glovebox, while the dash screen is only the display.
Typical models:
- Composition Media
- Discover Media
- Some MIB-based systems
Method A: Removing Older Volkswagen Radios with Release Keys
This method fits many older VW radios such as Beta, Gamma, Monsoon, RCD 200, and some earlier non-touch units.
Step 1: Inspect the front of the radio
Look for 2 or 4 narrow release slots on the radio face. These may be vertical or horizontal depending on the unit. If you see these slots, the radio almost certainly uses release keys.
Step 2: Insert the radio removal keys
Insert the correct keys into the slots until you feel them click into the spring clips. Do not force them. If they do not click, flip the key orientation and try again. Enthusiast removal discussions note that the keys sometimes need a slight wiggle to engage the clips properly.
Step 3: Pull the radio forward
Once both sides are released, pull evenly on both keys. Do not yank one side harder than the other. If the radio moves a few millimeters and stops, press the keys slightly deeper, wiggle gently, and try again.
Step 4: Support the radio as it slides out
Place a cloth over the gear surround or climate panel so the radio face does not scratch the trim.
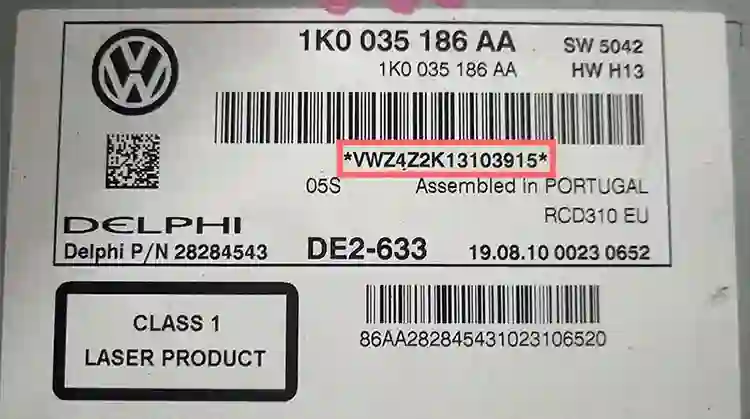
Step 5: Read the label
The serial label is usually on the top, side, or rear of the radio chassis. On many Volkswagen radios the serial begins with a format like VWZ…. Label examples on VW radios such as RCD and RNS units clearly show these printed serial identifiers on the casing labels.
Step 6: Photograph everything
Take one clear photo of:
- the full label
- the serial number
- the part number
- any barcode
This avoids having to remove the radio again.
Step 7: Remove the connectors only if necessary
If you can read the label with the radio partly out, leave the connectors attached. If the label is on the rear, disconnect the antenna and main harness carefully and note their positions first.
Best fit vehicles for Method A
This is common on:
- Golf Mk4
- Jetta Mk4 / Bora
- Passat B5 / B5.5
- New Beetle
- older Polo and Transporter applications
Method B: Removing RCD 300 / RCD 310 / RCD 510 / RNS 315 / RNS 510
This is the most common method for many mid-2000s to early-2010s Volkswagens.
Step 1: Protect the trim
Apply a cloth or low-tack painter’s tape around the bezel if the trim is glossy.
Step 2: Remove the trim bezel around the radio
Use a plastic trim tool and start at a lower corner. A VW enthusiast DIY for RCD-510 installation shows the bezel is typically unclipped first, then worked loose around the perimeter. Another Passat/CC DIY similarly begins by pulling from the lower corner and working around the radio surround.
Step 3: Remove the Torx screws
Once the bezel is off, remove the screws securing the radio. Place them somewhere safe in order.
Step 4: Pull the radio straight out
Use two hands and pull the unit forward slowly. Most VW radios are a snug fit and may need a little side-to-side movement.
Step 5: Locate the serial number label
On these units, the label is commonly on the top or side casing. Examples of RCD 510 and RNS 510 labels show the serial printed alongside the part number and hardware/software info.
Step 6: Disconnect only if the label is hidden
If the serial is on the top and readable, stop there. If not, unplug the main Quadlock connector by releasing the locking arm, then unplug the antenna lead. Do not pull on wires directly.
Step 7: Record these details
Write down:
- Part number
- Serial number
- Model family
- Manufacturer if shown, such as Delphi or Continental
These details help identify the exact code format and radio generation.
Best fit vehicles for Method B
This method is common on:
- Golf Mk5 / Mk6
- Jetta Mk5 / Mk6
- Passat B6 / CC
- Eos
- Tiguan (first generation)
- some Touran and Scirocco models
Method C: Composition Media / Discover Media / Later MIB Systems
Later Volkswagens can be confusing because the screen you see in the dashboard is not always the complete radio.
Important difference on newer systems
On many MIB-based setups, the screen and the main infotainment unit are separate. VW documentation and retrofit discussions reference infotainment accessories and modules in the glovebox, and enthusiasts specifically note that in some MIB configurations the glovebox module is the main unit while the dash component is only the display.
Step 1: Identify whether your car has a separate main unit
Check the glovebox for:
- an SD card slot
- a CD drive
- a media port
- a box-like infotainment module
If present, that is often where the usable label and serial information are located.
Step 2: Check the visible screen first
Some systems still have identifying numbers on the screen assembly, but that may only be the display part number, not the radio serial you need.
Step 3: Open the glovebox and inspect the infotainment unit
Use a flashlight and look at the top and side surfaces. If the unit is deeply mounted, you may need to remove glovebox trim or the glovebox itself.
Step 4: Remove surrounding trim if necessary
On some models, the screen or center trim must be removed first. On others, glovebox access is easier than center-dash access.
Step 5: Look for the serial label on the main unit
The label may show:
- part number
- hardware/software version
- manufacturer
- serial number
Step 6: Photograph the label
Do not rely on memory. One wrong character in a VW serial can make code retrieval fail.
Best fit vehicles for Method C
Often seen on:
- Golf Mk7 / Mk7.5
- Passat B8
- Arteon
- Tiguan Mk2
- some T-Roc, Taos, Polo, and later-platform models
Where the Serial Number Is Usually Found
On Volkswagen factory radios, the serial number is commonly found in one of these places:
- Top label on the metal casing
- Side label on the chassis
- Rear label near the connector block
- Main infotainment unit in glovebox on later systems
- Original radio card/booklet on older vehicles
A Volkswagen radio serial often starts with a code such as VWZ, though the exact prefix varies by unit and manufacturer. The label usually includes both the VW part number and a longer serial string. The example labels shown for RCD 510 and RNS 510 follow this pattern.
Volkswagen Model-by-Model Quick Guide
Golf / Jetta / Bora Mk4
Usually key-release radios. Insert the removal keys into the front slots, release both sides, and slide the radio out.
Golf / Jetta / Passat / Tiguan Mk5-Mk6 era
Usually trim-and-screw removal. Pop off the bezel, remove Torx screws, and pull the radio forward. RCD 310, RCD 510, RNS 315, and RNS 510 are commonly handled this way.
Golf Mk7 and newer
Do not assume the screen is the radio. Check whether the main unit is in the glovebox. Some MIB systems split the display and main module.
Passat B8 / newer infotainment-equipped VW models
Check both the dash display and glovebox area. If the screen has no useful serial, the main unit is the next place to inspect.
Common Mistakes to Avoid
Pulling with metal tools on visible trim
This scratches soft-touch and piano-black trim easily.
Using the wrong radio keys
VW radios use different release-key shapes. If the keys do not latch, do not force them.
Reading the wrong number
The part number is not always the serial number. You usually need the longer serial printed near the barcode.
Removing only the display on newer cars
On later MIB systems, the display may not contain the serial needed for code recovery.
Reinstalling before photographing the label
Always take photos first.
What to Do If the Radio Is Stuck
If the radio will not move:
- Make sure both clips are actually released.
- Reinsert the keys slightly deeper.
- Wiggle left and right gently, not violently.
- Check whether hidden screws are still in place.
- Do not pry the faceplate outward with a screwdriver.
VW enthusiast discussions specifically mention that removal keys may need a side-to-side wiggle to engage the retaining clips properly on stuck units.
After You Find the Label
Once you have the label, save:
- a full photo
- a close-up photo of the serial
- the vehicle VIN
- the radio model number
If your goal is radio code recovery, those are usually the most useful identifiers to keep together.